Laminate regained its former glory in the 1940s and 50s as a favourite kitchen countertop material. In the late 1980s, this material started losing its favourable position in many homes as homeowners replaced it with granite and solid-surfacing materials. Its survival was boosted in the mid-1990s following the introduction of plastic laminate flooring that revolutionized the industry.
This post shares details on how to install this flooring option without tools. Follow to learn more and see how our excellent flooring services can benefit your home.
1. Plank Acclimatization and Subfloor Preparation
You must allow your laminate planks to acclimate to their installation room before installing them. Lay out the laminate pieces in the room, allowing them to remain there for a minimum of two days and nights. This period lets them acclimate to the room’s moisture and temperature levels.
2. Prepare Your Subfloor
Next, prepare your subfloor before installation. Installing your laminate on a clean and smooth subfloor is safe. You may also install laminate over an old floor covering like sheet vinyl as long as it’s hard enough, smooth, and flat.
Prepare the subfloor by sweeping or vacuuming debris away. If you want to install it on a concrete basement floor, fix any chips on the floor. Remove all loose nails, patch cracks, and sand out uneven areas if the floor is wooden. Replace any damaged planks before fitting your laminate.
3. Trim Doorways
Trimming your door casings and side jambs is necessary to allow your planks to slip underneath them easily. While it might seem tiring, the trimming job is more manageable than installing laminate to notch the flooring around the doorways. You can use a pencil to mark where your laminate’s tip meets the door frame. Use a jamb saw to remove small wood pieces. You need to repeat the process before vacuuming the debris and dust.
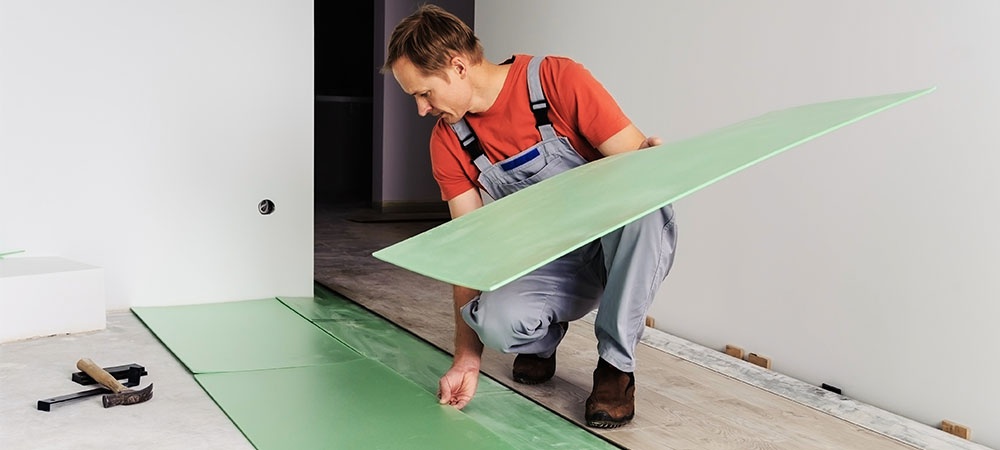
4. Underlayment Installation
You will need to install an underlayment before installing your laminate. Underlayment is a thin, dense foam designed to assist in absorbing sound and making your laminate flooring warmer. It also serves as a bridge over any dents or gaps in the subfloor. Some modern laminate flooring come with built-in underlayment. If yours comes with it, skip this installation stage.
When laying the underlayment, begin by rolling out two rows. Use a utility knife to trim it to fit your room’s dimensions. An underlying adhesive or tape would be ideal for sticking together the adjacent pieces.
When laying your underlayment sheets next to each other, ensure they don’t overlap. Otherwise, the underlayment will stack out on top of the other layer. This stacking creates bumps on your floor’s uneven sections. Installing a vapour barrier is necessary before fitting an underlayment when installing laminate in moisture-prone rooms like kitchens or basements
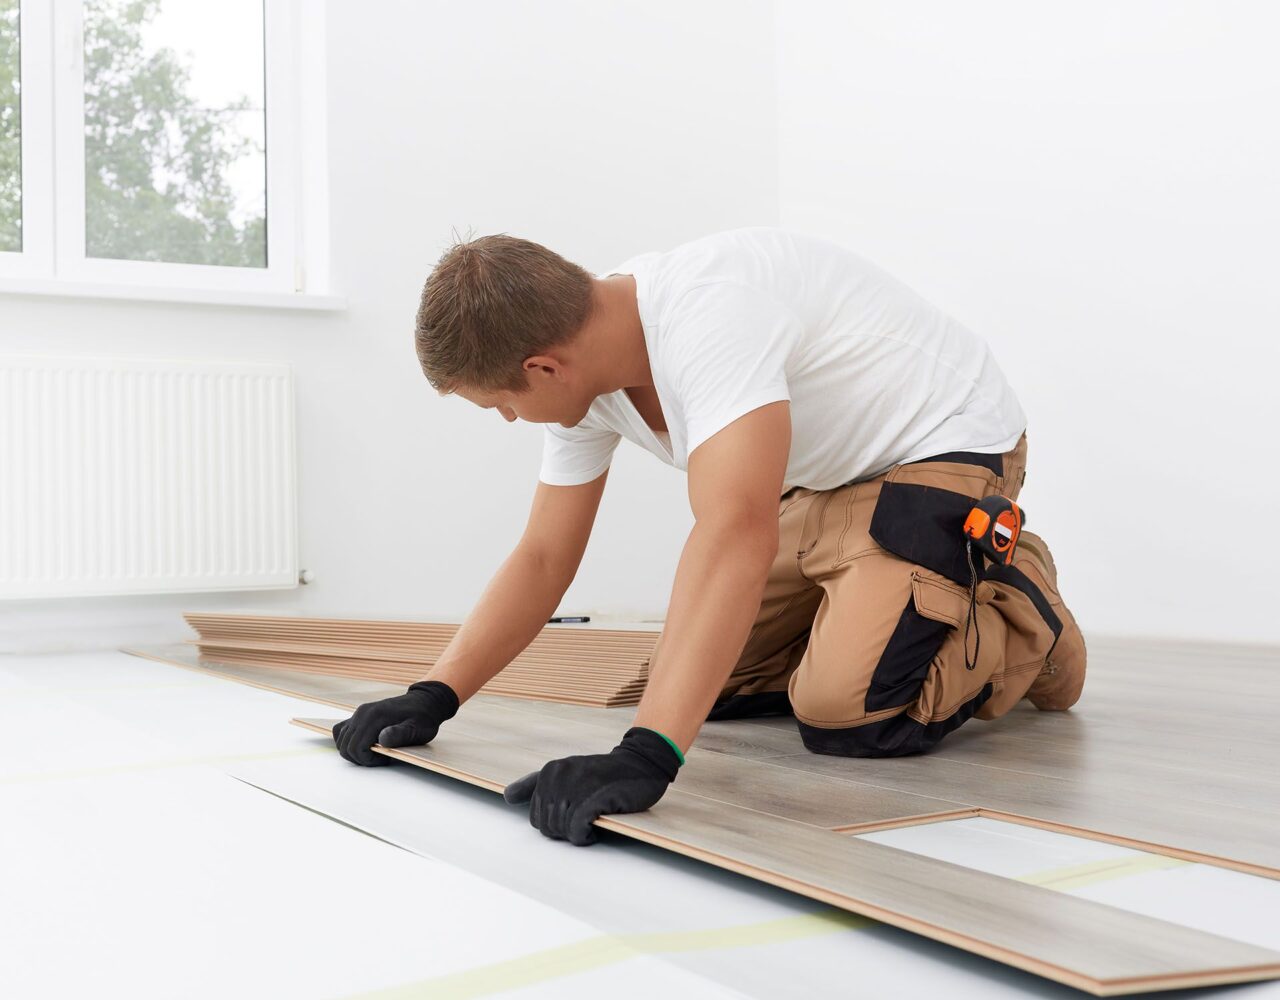
5. Lay Your Initial Laminate Row
So far, you have done the sufficient groundwork to start installing your laminate flooring. As a rule of thumb, it’s perfect to begin installing the flooring against your room’s longest wall. However, if the room has a big focal point, like a large window or fireplace, you may begin by applying the laminate parallel to the wall.
Begin fitting your first row by placing the planks with the inside against the wall. Using a utility knife, you may also trim the tongues from the boards in the initial row. But sometimes, you may skip this process because the baseboard might cover some of the first and last rows.
Afterward, place your following board’s groove into place and press down to fit it securely. You need to use ⅜ inch spacers along the wall to allow space for the flooring’s expansion and contraction over time. At this stage, you are ready to start installing other rows.
6. Lay More Planks
Now it’s time to start laying other plank rows. You should place a plank longer or shorter than the first one in the initial row. Stagger the seams in the rows to help create more secure installations and attractive looks. Try staggering at least one foot from each adjacent seam.
We recommend using a tapping block or a pulling bar to secure your laminate boards. These tools are perfect for helping you tightly secure the boards without gaps between them.
Now you have to install the last laminate row. Here, you require some width off of your laminate boards. When fitting this last row, placing the planks at an angle is helpful to make them fit tightly in their proper spaces.
Installing your last row is most manageable by snapping together all the laminate boards end-to-end. Next, you must tilt the entire row into place against the previous row. You need to align the tongue-and-groove joint, then press it down on the last row.
If you find it necessary, you may slip a pry wood between the baseboard and the last row. Sliding a thin plywood piece or hardwood behind the pry protects the baseboard. Lastly, apply more pressure to close the joint securely.
7. Add Final Touches
Lastly, you ought to add the final touches to have a stunning laminate floor that makes your room a focal point. After installing your laminate flooring, removing the spaces against the wall is necessary. You have to install door baseboards and thresholds around your room. Remember to caulk the baseboard’s edges to have a smooth, finished appearance.

Call Us to Laminate Your Floor Today
There you go with all the facts you need to install a laminate flooring with no-tool installation. However, working with a professional installer is the best option for your home.
A flooring expert like Bayfield saves you the many challenges of DIY projects. We have the best installation tools and experienced experts. Moreover, our services are insured to give you peace of mind, knowing that our insurer will shoulder anything that could go wrong.
Go ahead and contact us today for a free quote and consultation to kickstart your next flooring project in Ontario.